Mastering Gimbal Rotations in Creature Flight Cycles
Learn how to use gimbal rotations, spline tangents, and real-world bat reference to build heavy, realistic dragon flying cycles in Maya.
Article by Richard Arroyo & iAnimate Team, 2026-09-11
Gimbal rotations are an axis-by-axis rotation setup used to isolate individual curves in 3D animation. Senior animator Ivan uses them to prevent diagonal axis drift during dragon flying cycles. This guide teaches clean curve control.
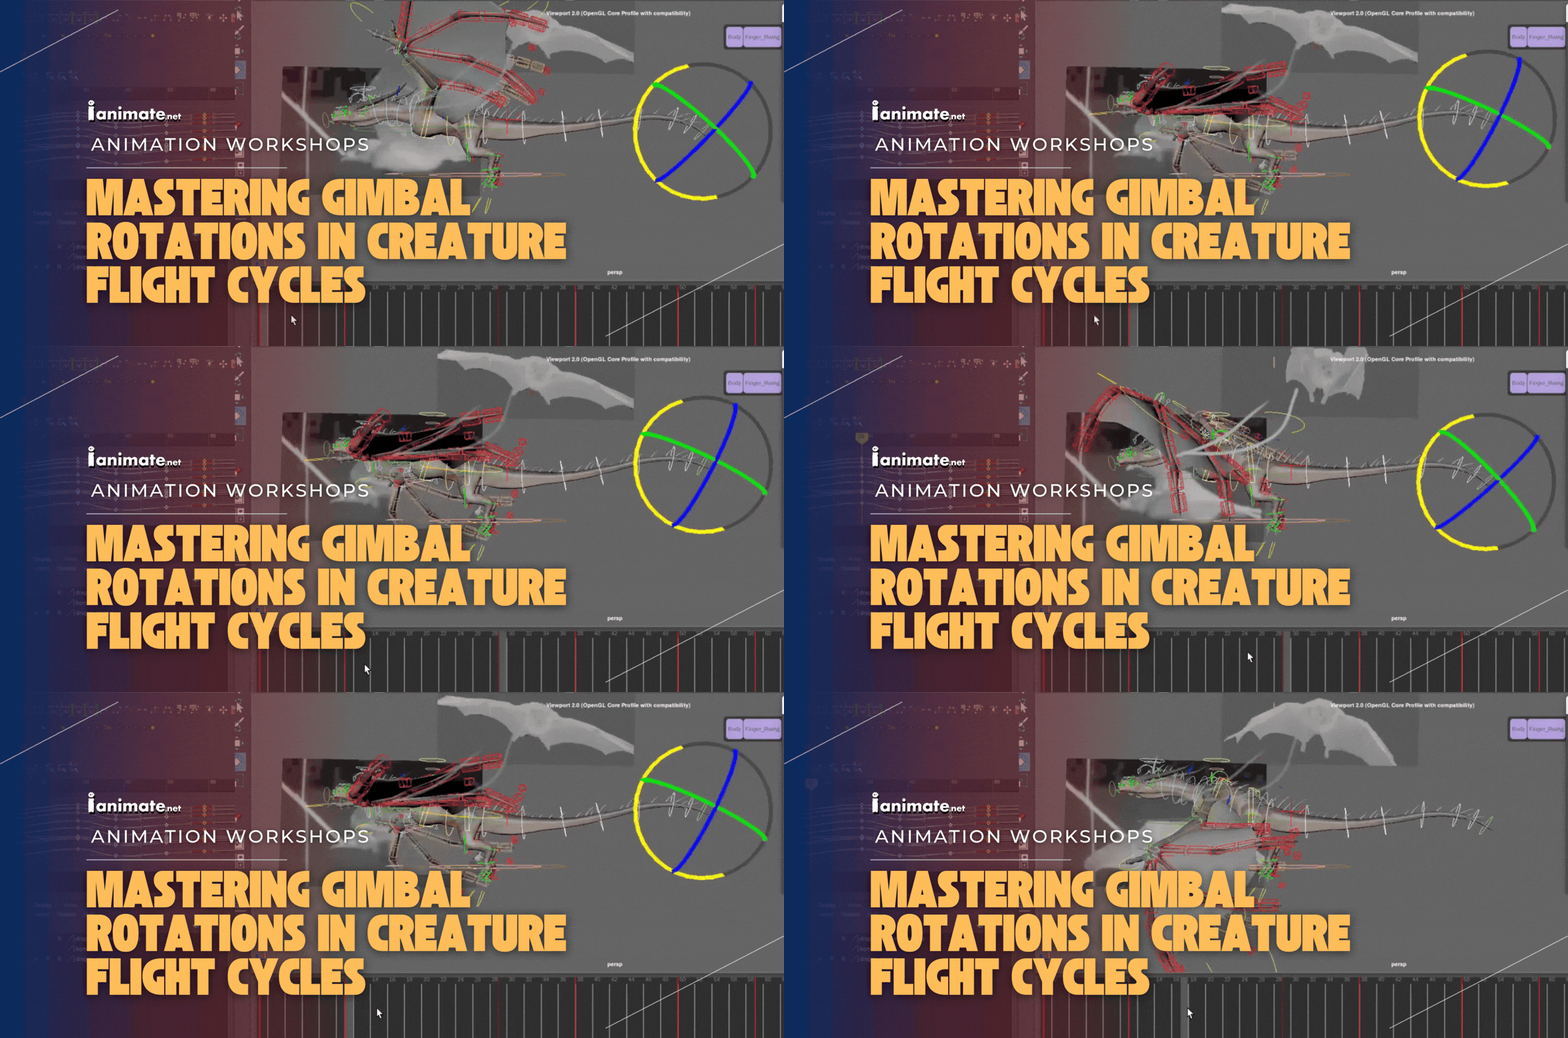
Do you struggle to keep your creature flight cycles looking heavy, clean, and mechanically plausible? When you rotate the wings or the chest of a massive dragon, do your Graph Editor curves turn into a tangled web of diagonal values that are impossible to clean up?
Many animators find themselves trapped in "interpolation hell" because they rely on default rotation spaces that mix X, Y, and Z axes. By switching your control parameters to gimbal rotations, you can isolate your animation curves to single-axis movements, ensuring your arcs remain clean and your keyframes remain highly editable. In this guide, you will learn how to set up gimbal rotations, utilize bat reference for realistic wing mechanics, and build a high-fidelity flying cycle in Autodesk Maya.
This workflow is developed by Ivan, a lead animator at Rodeo FX in Montreal, who recently completed work on HBO’s VFX-heavy series House of the Dragon under the supervision of Oscar Carambano.
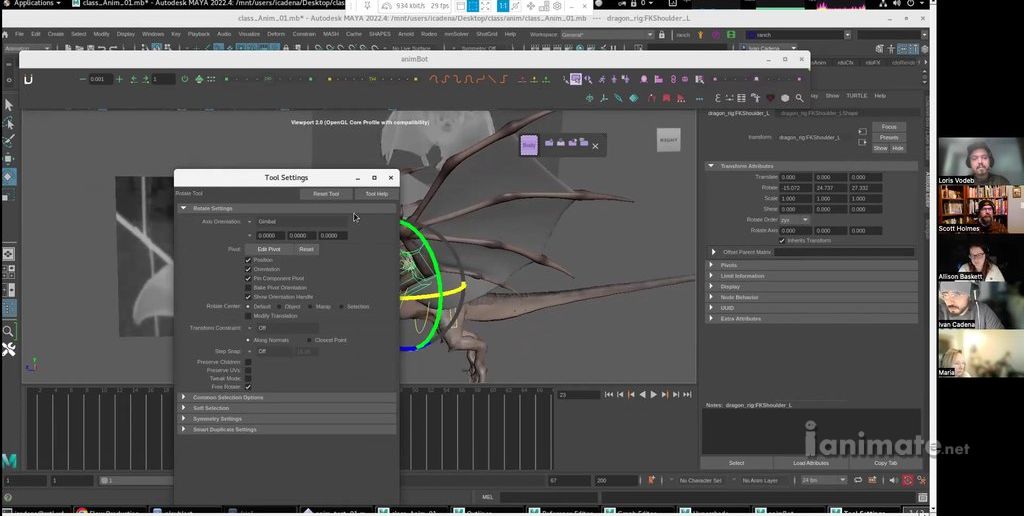
Technical Setup: Isolating Axes with Gimbal Rotations
Gimbal rotations refer to the execution of rotations in 3D space by isolating each coordinate axis (X, Y, and Z) to prevent multi-axis interpolation drift. By using gimbal mode instead of default world or local rotation spaces, animators can manage precise up-and-down or side-to-side curves independently in the Graph Editor. This isolation is crucial for complex creature rigs where micro-movements must be tuned without corrupting adjacent rotation coordinates. (Source: iAnimate, Creature Workshop, 2026)
When animating complex creature anatomy like a dragon's shoulder joint, default rotation settings often apply values across all three axes simultaneously. This creates diagonal arcs that make cleaning up your curves nearly impossible. Switching your transformation tools to gimbal mode changes everything.
- Isolate your curves by switching your rotation tool setting in Maya from "Local" or "World" to "Gimbal".
- Manage independent axes so that an up-and-down wing stroke only populates keys on a single curve (e.g., Rotate Y), leaving your twist and swing channels clean.
- Prevent gimbal lock by planning your primary rotational direction first and setting up your joint orientations to align with the core mechanics of the flying cycle.
Using this method ensures that when you need to adjust the height of a wing tip or the roll of a chest, you do not accidentally introduce wobble on the perpendicular axes.
At Rodeo FX, isolating axes via gimbal rotations is a standard production practice that allows animators to quickly address supervisor feedback without rewriting their entire pose library.
Setting Up the Reference Layer with Image Sequences
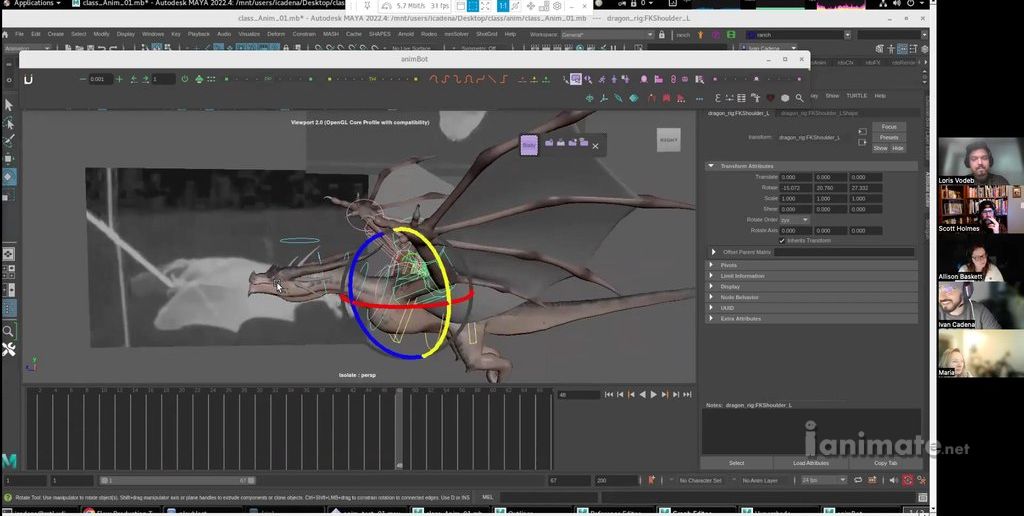
Image sequences applied directly to a polygon plane as a texture shader provide a superior alternative to standard camera image planes. This setup allows animators to break the default image sequence expression, giving them manual frame-by-frame control to shift, speed up, or slow down reference timing directly within the timeline. Utilizing real-world bat flight reference is the gold standard for replicating the mechanical behavior of large wing membranes.
Replicating fantasy creatures requires high-quality real-world reference. While bird reference is helpful for feathered creatures, bats are the ultimate reference source for dragons due to their skin membrane structure. However, import mechanisms can make using these references difficult in Maya.
Camera Image Planes vs. Textured Polygon Planes
| Feature | Camera Image Planes | Textured Polygon Planes |
| Viewport Flexibility | Stuck to camera view; difficult to scale or offset in 3D space. | Can be placed anywhere in the 3D scene, rotated, and scaled next to the rig. |
| Timing Customization | Locked to the global timeline unless complex offset expressions are written. | Highly editable; breaking the default texture expression allows frame-by-frame keys. |
| Performance | Can cause viewport lag during high-resolution playback. | Lightweight and easily toggled off via display layers. |
- Texture your reference by creating a simple polygon plane, applying a lambert shader, and loading your bat flight cycle as an image sequence.
- Break the texture expression in the attribute editor of the file node so the "Frame Extension" channel can be animated manually.
- Retime the reference to match the scale and weight of your dragon, slowing down the fast-flapping bat reference to imply a multi-ton creature.
This approach gives you total control over how the reference plays back, ensuring your technical source matches the physical scale of your fantasy creature.
Ivan uses textured reference planes daily in his feature film workflows, allowing him to place bat reference directly alongside his dragon rigs for side-by-side pose matching.
Step-by-Step Guide: Animating the Core Flying Cycle
A flying cycle requires a precise relationship between wing flaps and body translation. According to the physics of flight, a creature's body loses height during the upstroke due to gravity and gains upward velocity during the downstroke. Animating this relationship requires tight synchronization of the core hips, chest, and shoulder joints. (Source: iAnimate Creature Workshop 3, 2026)
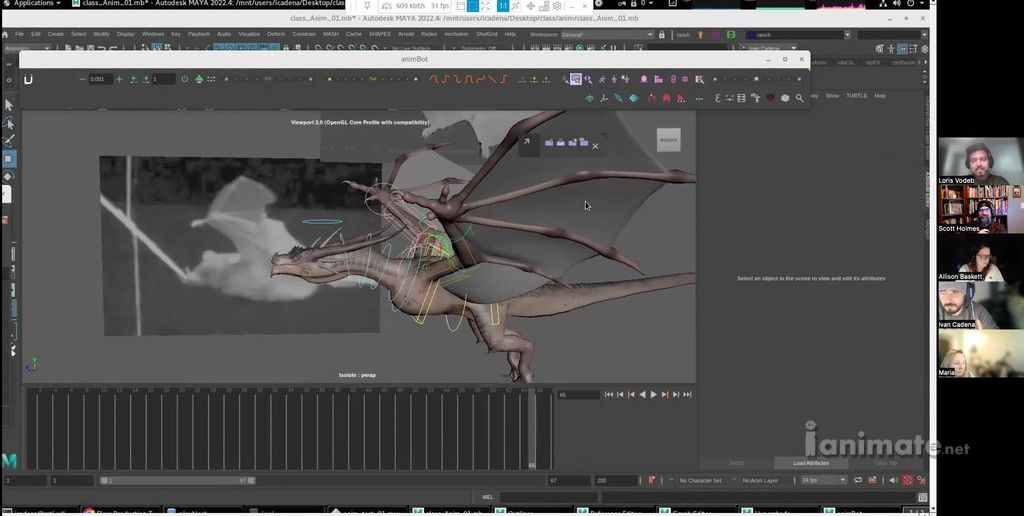
In production, you will often work with referenced rigs and props. Maya will frequently throw errors if you attempt to directly constrain or group these referenced nodes. To bypass this limitation, we use AnimBot to build custom, temporary parent controls.
Blocking the Core Flight Mechanics
- Set Up the Base Hierarchy Controls: Hide all secondary and tertiary controllers (like fingers and tail joints) to keep your viewport clean and prevent selection errors.
- Establish the Body Up-and-Down Translation: Frame your cycle. At the peak of the wing upstroke, translate the main body control down along the Y-axis. At the completion of the wing downstroke, translate the body control upward to show the physical force of the flap.
- Pose the Wings at Extremes: Create your high pose (wings fully extended upward, preparing to scoop air) and your low pose (wings driving down, meeting maximum air resistance).
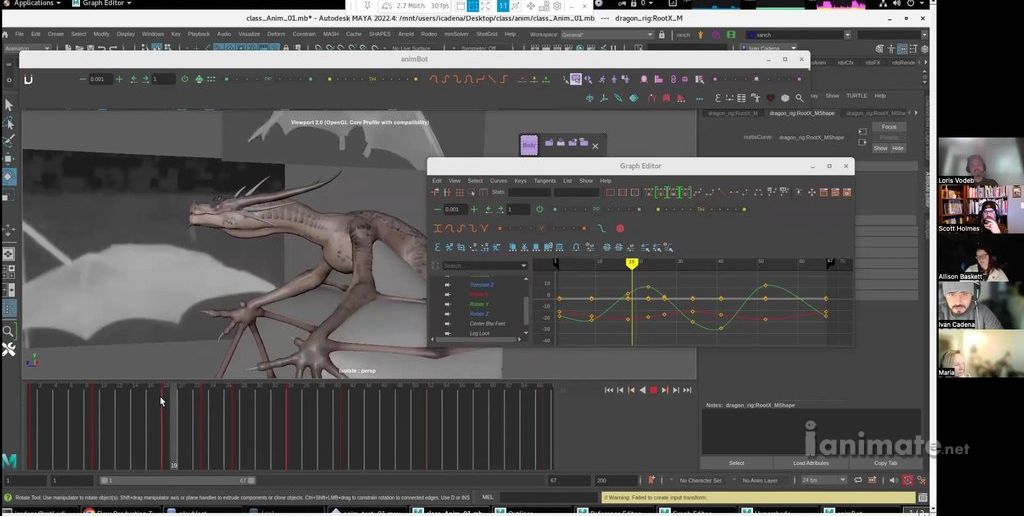
- Align the Shoulder Gimbal Curves: Check your Graph Editor. Ensure the primary rotation curve for the downstroke is clean and free of counter-rotational noise on other axes.
- Copy and Paste the Extremes to Create the Cycle: Copy your keyframe values from Frame 1 to your final frame (e.g., Frame 33) to establish a perfect loop, then use the Graph Editor's post-infinity cycle settings to check the continuity.
While working on House of the Dragon, animators had to balance realism with art direction, ensuring that even fictional beasts strictly adhered to aerodynamic laws of mass and lift.
Refining the Motion: Spline Tangents and Moving Holds
Spline tangents are vital for maintaining constant biological motion in creature animation, as organic characters are never completely still. Utilizing spline interpolation instead of stepped or flat tangents automatically introduces natural overshoots and micro-movements, which are critical for establishing convincing moving holds. This technique keeps the asset from feeling robotic or dead during pauses in active flight. (Source: Autodesk, 2025)
One of the most common errors in creature animation is allowing parts of the body to freeze. In the real world, a living animal is always moving, adjusting its balance, or breathing.
- Default to spline tangents rather than flat tangents to ensure the computer calculates continuous sub-frame motion between your primary poses.
- Build moving holds by placing keyframes close in value, allowing the natural overshoot of the spline curves to create micro-drifts in position.
- Monitor the Graph Editor to remove harsh, flat plateaus. A flat line in your curves equates to a dead hold in your performance, which immediately breaks the illusion of life.
By utilizing spline tangents to your advantage, you can build organic weight with fewer manual keyframes.
Master animators rely on the subtle overshoot of spline curves to keep massive creatures like Silverwing looking alive, even during slower, hovering sequences.
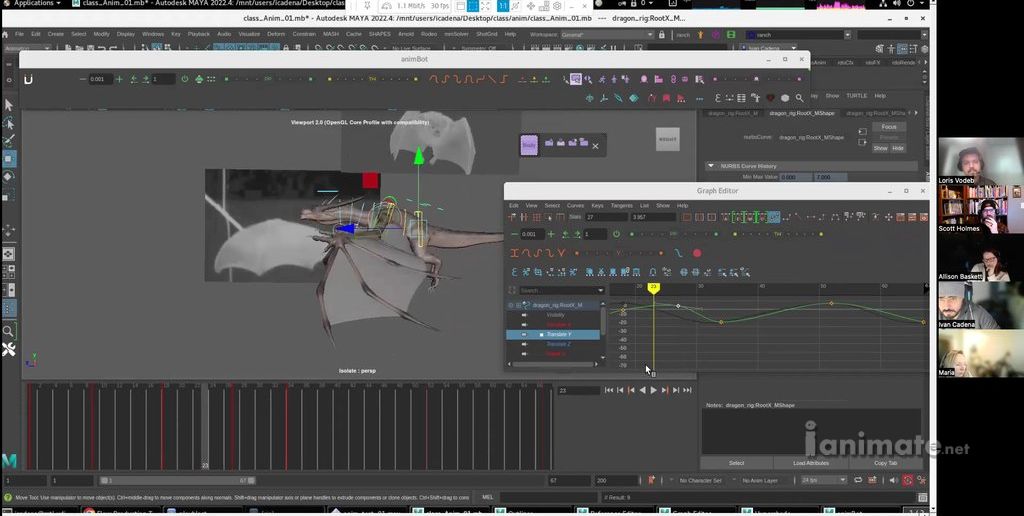
Animation Tips from Scott Holmes’ Creature Animation Workshop 3:
- Weight Translation: A flying creature loses height when its wings are in the upstroke position due to gravity, and rises when the wings push down.
- Wing Mechanics: Bats provide the best visual reference for large dragon wing membranes, whereas birds move differently due to feathers.
- Production Efficiency: 99% of animation quality depends directly on the quality and analysis of your reference material.
Source: Scott Holmes iAnimate Instructor, 2026
Layering Weight and Overlap: Tail, Chest, and Head Leading
Overlap and secondary motion are critical components of creature animation that are built on the wave and pendulum principles. When a creature flies, the head leads the motion path, tilting down first during descents, while the chest, hips, and tail follow sequentially with distinct frame offsets. This hierarchical delay creates the illusion of organic muscle mass and physical weight. (Source: iAnimate, 2026)
To make a dragon feel like it weighs several tons, you must avoid having all its body parts hit their poses at the same time. This is where overlap, drag, and delay come into play.
- Lead with the head by having the nose tilt down first as the body drops, and tilt upward as the body rises.
- Delay the chest and hips by offsetting their keyframes in the Graph Editor by two to three frames behind the head's rotation.
- Apply the pendulum principle to the tail so that the base of the tail reacts first, transferring energy through the mid-section down to the tip in a smooth wave pattern.
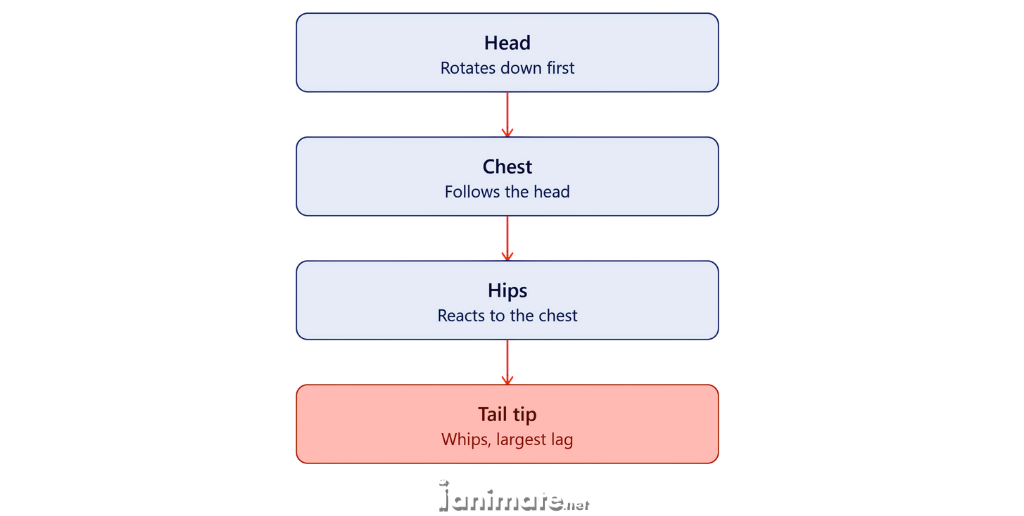
By animating this chain of motion, you create a sense of muscle, bone, and skin reacting to external forces.
On House of the Dragon, getting the tail and wing membrane overlap correct was a continuous point of review, requiring animators to balance dynamic muscle weight with aerodynamic drag.
"I gained hands-on experience with industry-standard animation workflows and received direct feedback from top professionals.”
Achieving Believable Weight in Creature Animation
Mastering creature animation is more than just making pretty poses; it is about respecting the laws of physics, mass, and aerodynamics. By isolating your curves with gimbal rotations, analyzing real-world reference, and structuring your overlapping animation hierarchy from head to tail, you can elevate your creature performance to a professional standard.
If you are worried that your work feels stiff or lacks weight, simplify your approach. Isolate your primary controllers, clean up your Graph Editor curves, and let the physics of flight guide your timing.
Bottom line: True creature weight is created by coordinating the relationship between your primary body translation and the physical force of your wing strokes.
Frequently Asked Questions: Gimbal Rotations
What is the difference between gimbal rotation and local rotation in Maya?
Local rotation calculates orientation relative to the object's parent, which often changes values across multiple axes when rotated diagonally. Gimbal rotation isolates your movements to the actual physical axes of the control joint, allowing you to edit individual rotation curves in the Graph Editor without affecting the other channels.
Why do my dragon wings feel too light during the upstroke?
If your wings feel too light, you may have timed the body's up-and-down motion incorrectly. The body must begin dropping the moment the wings start their upstroke because the wings are no longer pushing against gravity. If the body stays high or rises during the upstroke, the creature will lose its sense of physical weight.
Why is bat reference better than bird reference for animating dragons?
Bats are the ideal reference for dragons because they have a similar skeletal wing structure with skin membranes stretched over elongated fingers. Birds rely on feathers, which allow air to pass through during the upstroke and have different aerodynamic properties. The skin membrane of a bat must fold, stretch, and scoop air in a way that closely matches a dragon's wing mechanics.
How do I prevent gimbal lock when animating complex flight paths?
You can prevent gimbal lock by planning your primary rotational direction beforehand and adjusting your joint orientation order in Maya's Attribute Editor. For example, changing the rotation order to ZXY or YXZ can keep your primary axis free from locking up when your creature performs extreme turns or dives.
Should I use IK or FK to animate a dragon's legs during flight?
Forward Kinematics (FK) is generally preferred for creature legs during flight because the legs hang freely in the air, allowing you to easily animate smooth, overlapping arcs. Inverse Kinematics (IK) should be reserved for landing, taking off, or interacting with ground surfaces where the feet must remain planted.
Written by iAnimate from Scott Holmes Creature Workshop
Scott Holmes is an award-winning Animation Supervisor and Head of Animation with more than 25 years of experience creating creatures and visual effects for blockbuster films. Currently leading animation at Cinesite VFX in Montreal, his credits include The Lord of the Rings: The Two Towers, The Chronicles of Narnia: The Lion, the Witch and the Wardrobe, Hellboy II, Ant-Man and the Wasp, and Pokémon Detective Pikachu.
Want to learn animation with Scott? Apply to Creature Workshop now and start your journey.
Listen to Scott Holme’s latest podcast with iAnimate:
iAnimate instructors are elite industry professionals working at major global studios like Rodeo FX, Sony Pictures Imageworks, and Industrial Light & Magic. Using years of production experience on projects like HBO’s House of the Dragon, they provide students with technical workflows designed for modern VFX and feature film pipelines.
Is This for You?
This post is for you if:
- Your creature animation curves are messy and difficult to clean up in the Graph Editor.
- You want to animate a dragon flight cycle that feels heavy and physically realistic.
- You struggle to create smooth overlapping motion between a creature's chest, head, and tail.
Key Takeaway
Gimbal rotations allow you to isolate individual curves to prevent diagonal axis drift during complex creature flying cycles.
About the Author
Richard Arroyo is a Creative Director and Content Director at Ubisoft Montreal, as well as a Partner and Manager at iAnimate, with a career spanning feature film, animation, television, and video games since 1999. He has directed major titles including Skull & Bones, Watch Dogs Legion, and Rainbow Six Siege, and has helped shape iAnimate’s Games, Creature, Motion Capture, Rigging, and Pre-Visualization programs.